Honeywell Thermostat TH6220U2000 Installation & User Guide ⎻ Article Plan (02/17/2026)
Today’s date is February 17, 2026, at 9:29:13 PM. This comprehensive guide assists users in understanding and effectively operating their new Honeywell TH6220U2000 thermostat.
Welcome! This manual provides essential information for your Honeywell TH6220U2000 thermostat, ensuring proper installation and operation for optimal home comfort and energy efficiency.
What is the TH6220U2000?
The Honeywell TH6220U2000 is a non-programmable thermostat designed to provide reliable temperature control for your home’s heating and cooling systems. It’s a user-friendly alternative to more complex programmable models, offering straightforward operation without sacrificing essential functionality. This thermostat is ideal for individuals who prefer a simple, set-it-and-forget-it approach to home climate management.
Unlike smart thermostats with extensive features, the TH6220U2000 focuses on core temperature regulation. It accurately senses room temperature and signals your HVAC system to maintain your desired settings. The large, easy-to-read display clearly shows the current temperature and setpoint, making adjustments quick and intuitive.
It’s a popular choice for replacing older thermostats in standard HVAC setups, offering a cost-effective upgrade without requiring extensive technical knowledge. While it doesn’t offer Wi-Fi connectivity or advanced scheduling, its simplicity and dependability make it a valuable addition to any home.
Key Features and Benefits
The Honeywell TH6220U2000 boasts several key features designed for ease of use and reliable performance. Its large, backlit display ensures clear visibility in any lighting conditions, showing both the current and set temperatures prominently. The thermostat offers simple push-button controls, eliminating complicated menus or touchscreen interfaces.
A significant benefit is its compatibility with most standard 24V heating and cooling systems, making it a versatile replacement option. It supports single-stage heating and cooling, as well as heat pump systems with auxiliary heat. The TH6220U2000 also includes a battery backup, ensuring continued operation even during power outages.
Beyond functionality, the thermostat provides accurate temperature control, contributing to consistent comfort and potential energy savings. Its straightforward design minimizes the learning curve, allowing users to quickly set their desired temperature and enjoy a comfortable home environment. It’s a dependable and affordable solution for basic climate control needs.
Package Contents ⎻ What’s in the Box?
Upon opening your Honeywell TH6220U2000 package, you should find the following components carefully included. First, the TH6220U2000 Thermostat unit itself, the central component for controlling your home’s temperature. You’ll also receive a mounting baseplate, essential for securely attaching the thermostat to the wall.
Included are screws and wall anchors, providing the necessary hardware for a stable installation on various wall types. A wire label sheet is provided to help you accurately identify and label the existing wiring during removal of your old thermostat. This is crucial for correct reconnection.
Furthermore, the package contains a quick installation guide offering a simplified overview of the setup process. Finally, a detailed user manual is included, providing comprehensive instructions, troubleshooting tips, and detailed explanations of all features. Ensure all items are present before beginning the installation process.
Safety Precautions & Warnings
Prioritize safety during installation! Disconnect power before wiring. Incorrect wiring can damage HVAC systems or create hazards; professional help is recommended if unsure.
Electrical Safety Guidelines
Crucially, always disconnect power to your heating, ventilation, and air conditioning (HVAC) system at the breaker box or fuse before beginning any wiring or installation procedures. This prevents electrical shock and potential damage to the thermostat or HVAC components. Verify the power is off using a non-contact voltage tester at the thermostat wires.
Never work with wet hands or in a damp environment when handling electrical wiring. Ensure the work area is dry and well-lit. If you are uncomfortable working with electrical wiring, consult a qualified HVAC technician for assistance. Improper wiring can lead to short circuits, fire hazards, or damage to your equipment.
Use insulated tools designed for electrical work. Carefully inspect all wiring for damage or fraying before connecting it to the thermostat. Follow the wiring diagram provided in this manual precisely. If the wiring appears different from the diagram, do not proceed and seek professional help. Always double-check your connections before restoring power.
Important Installation Warnings
Incorrect installation can damage your HVAC system and void the thermostat’s warranty. Ensure you thoroughly understand these instructions before proceeding. Do not attempt to connect the TH6220U2000 to high-voltage systems (over 24V), as this will cause irreparable damage. This thermostat is designed for standard low-voltage HVAC systems only.
Improper wiring can lead to system malfunctions, including continuous heating or cooling. Carefully label each wire before disconnecting it from the old thermostat to ensure correct reconnection. Avoid forcing wires into terminals; they should fit snugly but not require excessive pressure.
If you encounter any difficulties or are unsure about any step, stop immediately and consult a qualified HVAC professional. Do not modify the thermostat’s wiring or components in any way. Keep small parts and packaging materials away from children. Failure to follow these warnings could result in property damage or personal injury.
General Safety Considerations
Always prioritize safety during the installation process. Wear appropriate eye protection to shield against dust or debris. Work in a well-lit and dry environment to minimize the risk of electrical shock. Be mindful of your surroundings and avoid working in cluttered spaces.
If you are uncomfortable working with electrical wiring, seek assistance from a qualified HVAC technician. Never work on the HVAC system while it is energized. Double-check all connections to ensure they are secure and properly insulated. Keep the work area clean and organized to prevent tripping hazards.
Dispose of old batteries responsibly, following local regulations. Do not disassemble or attempt to repair the thermostat yourself. Regularly inspect the wiring and connections for any signs of damage or wear. Remember that safety is paramount, and taking precautions can prevent accidents and ensure a successful installation.

Pre-Installation Checklist
Before beginning, gather necessary tools, verify HVAC compatibility, and carefully identify your existing wiring configuration for a smooth and successful thermostat installation process.
Tools Required for Installation
Ensuring a smooth installation necessitates having the correct tools readily available. A Phillips head screwdriver is crucial for removing faceplates and securing the thermostat base. A small flathead screwdriver may be needed for certain terminal connections.
Wire strippers are essential for preparing the existing and new wiring, ensuring clean and secure connections. A wire connector tool, or wire nuts, will safely join wires together. A level is vital for mounting the thermostat straight, guaranteeing accurate temperature readings.
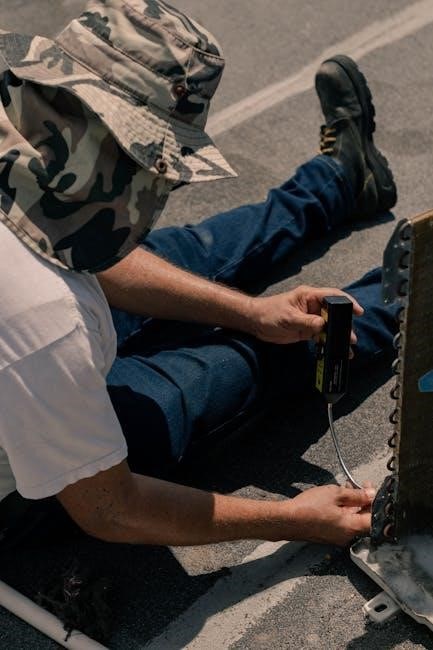
For testing, a non-contact voltage tester confirms power is off before handling wires, prioritizing safety. A digital multimeter can verify voltage and continuity if troubleshooting is required. A pencil is useful for marking wires during removal, aiding in correct re-connection. Finally, a camera or smartphone is helpful for documenting the existing wiring setup before disconnection – a crucial step for reference!
Compatibility Check ⎻ HVAC System Requirements
Before beginning installation, verifying compatibility with your existing HVAC system is paramount. The Honeywell TH6220U2000 is generally compatible with most 24-volt heating and cooling systems, including furnaces, air conditioners, and heat pumps.
However, it’s crucial to confirm your system doesn’t utilize line voltage (120V or 240V) thermostats, as the TH6220U2000 is not designed for these. Systems with proprietary communication protocols, or those requiring a “C-wire” (common wire) for constant power, may need additional components or adapters.
Check your existing thermostat wiring; if you lack a C-wire, a C-wire adapter kit might be necessary. The TH6220U2000 supports single-stage, multi-stage, and heat pump systems, but complex zoning systems may require professional installation. Always consult a qualified HVAC technician if unsure about compatibility to avoid damage or malfunction.
Identifying Existing Wiring
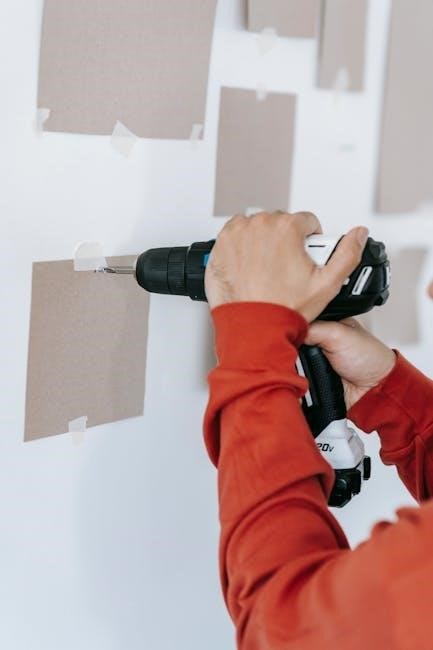
Before disconnecting your old thermostat, carefully document the existing wiring configuration. Take a clear photograph of the wiring connections as a reference. Typically, wires are color-coded, but this isn’t always consistent. Common terminal designations include R (power), C (common – often missing), W (heat), Y (cool), and G (fan).
Use a small screwdriver to gently loosen the screws holding the wires in place. Label each wire with a piece of tape, corresponding to its terminal designation. If wires are unlabeled or colors are non-standard, trace the wires back to their source within the HVAC system to determine their function.
Caution: Never disconnect wires without labeling them first! Incorrect wiring can damage your HVAC system or the new thermostat. If you are uncomfortable identifying the wiring, consult a qualified HVAC professional for assistance. Accurate identification is crucial for a successful installation.
Installation Process ー Step-by-Step
Begin by ensuring all power is disconnected to your HVAC system at the breaker. Then, carefully remove your old thermostat and proceed with wiring the TH6220U2000.
Turning Off Power to the HVAC System
Before commencing any installation work on your Honeywell TH6220U2000 thermostat, absolutely prioritize safety by completely disconnecting the power supply to your heating, ventilation, and air conditioning (HVAC) system. This crucial step prevents electrical shock and potential damage to both the thermostat and your HVAC equipment.
Locate the circuit breaker panel that controls your HVAC system. It’s typically found in the basement, garage, or utility room. Identify the breaker specifically labeled for the furnace or air handler – often marked as “Furnace,” “HVAC,” or with a similar designation.
Firmly switch the breaker to the “OFF” position. To confirm the power is indeed off, use a non-contact voltage tester at the existing thermostat wires. If the tester doesn’t indicate any voltage, you’re safe to proceed. Double-checking is essential! Leaving the power on during installation could result in serious injury or equipment malfunction.
Remember to inform other household members that you are working on the HVAC system and that it will be temporarily unavailable.
Removing the Old Thermostat
With the power to your HVAC system safely disconnected, you can now proceed to remove your existing thermostat. Carefully examine the old thermostat’s faceplate. Most models either snap off or are secured with screws. If it snaps off, gently pry it away from the wallplate, being cautious not to damage the wall. If screws are present, unscrew them and retain them for potential future use.
Once the faceplate is removed, you’ll see the wiring connected to terminals. Before disconnecting any wires, it’s vitally important to clearly label each wire with the corresponding terminal designation. Use the provided wire labels or create your own using masking tape and a pen. Accurate labeling is crucial for correct wiring of the TH6220U2000.
Gently disconnect each wire from its terminal; Once all wires are disconnected, remove the old wallplate from the wall. You may need to unscrew it or it might simply lift off. Prepare the wall for the new thermostat’s wallplate.
Wiring the TH6220U2000 ー Terminal Connections
Using the labels you created during old thermostat removal, connect each wire to the corresponding terminal on the TH6220U2000’s wallplate. Refer to the wiring diagram included with your thermostat – it’s essential for accurate connections. Typically, terminals are labeled with letters like R, C, W, Y, and G.
Ensure each wire is securely inserted into its terminal. Gently tug on each wire to confirm a firm connection. Loose connections can cause malfunctions. The ‘C’ wire (common wire) is often blue and provides continuous power to the thermostat; its connection is critical for proper operation.
If you don’t have a ‘C’ wire, consult the Honeywell documentation for potential solutions, such as using a C-wire adapter. Double-check all connections against the wiring diagram before proceeding. Incorrect wiring can damage your HVAC system or the thermostat itself.
Post-Installation & Setup
Now that installation is complete, restore power to your HVAC system and begin the initial setup process on the thermostat’s display screen.
Powering On and Initial Setup
After carefully completing the wiring, restore power to your HVAC system at the breaker box. The Honeywell TH6220U2000 should power on automatically, displaying a welcome screen.
The initial setup will guide you through several essential configurations. First, you’ll be prompted to select your preferred language. Next, the thermostat will ask for your zip code to accurately determine your local time and weather conditions.
Following this, you’ll configure your system type – specifying whether you have a furnace, air conditioner, heat pump, or a combination. Accurate system identification is crucial for optimal performance. The thermostat will then walk you through setting the date and time.
Finally, you may be asked to name your thermostat for easy identification if you have multiple Honeywell Home devices. Take your time and carefully follow each step to ensure a smooth and accurate setup process.
Connecting to Wi-Fi (if applicable)
To unlock the full potential of your Honeywell TH6220U2000, connecting it to your home Wi-Fi network is highly recommended. This enables remote control and monitoring via the Honeywell Home app. From the thermostat’s main menu, navigate to the “Connect to Wi-Fi” option.
The thermostat will scan for available networks. Select your network from the list and enter your Wi-Fi password when prompted. Ensure you are using a 2.4 GHz network, as the TH6220U2000 may not be compatible with 5 GHz networks.
Once connected, the thermostat will display a confirmation message. Download the Honeywell Home app on your smartphone or tablet and create an account. Follow the in-app instructions to add your thermostat to your Honeywell Home system.
Successful Wi-Fi connection allows for features like remote temperature adjustments, scheduling, and receiving alerts regarding your HVAC system’s performance.
Programming the Thermostat ー Basic Scheduling
The Honeywell TH6220U2000 allows for customized temperature scheduling to optimize comfort and energy savings. Access the “Schedule” option from the main menu. You can create different schedules for weekdays and weekends, or customize each day individually.
For each period (Wake, Leave, Return, Sleep), set your desired temperature. The thermostat will automatically adjust the temperature based on the programmed schedule. You can also set temporary holds to override the schedule for a specific duration.
Utilize the “Smart Response” feature to allow the thermostat to learn your heating and cooling preferences and adjust the schedule accordingly. Experiment with different settings to find the optimal balance between comfort and energy efficiency.

Review your schedule regularly to ensure it aligns with your lifestyle and seasonal changes. Consistent scheduling maximizes the benefits of your Honeywell thermostat.
Troubleshooting Common Issues
This section details solutions for frequently encountered problems, including power failures, inaccurate readings, and Wi-Fi connectivity issues, ensuring optimal thermostat performance.
Thermostat Not Powering On
If your Honeywell TH6220U2000 thermostat fails to power on, begin by verifying the power supply. First, ensure the HVAC system’s breaker is switched on and functioning correctly. Next, double-check the thermostat wiring at the wall plate, confirming all connections are secure and match the wiring diagram.
Loose wires are a common culprit. Also, inspect the C-wire (common wire) connection, as this is crucial for consistent power. If a C-wire isn’t present, a C-wire adapter might be necessary – consult a qualified HVAC technician for assistance. Furthermore, confirm that the thermostat is properly seated on the wall plate base.
If the issue persists, try replacing the batteries (if applicable, some models use batteries as a backup). Finally, if none of these steps resolve the problem, there might be an internal fault within the thermostat itself, requiring professional repair or replacement. Always prioritize safety and disconnect power before inspecting wiring.
Incorrect Temperature Readings
Experiencing inaccurate temperature readings on your Honeywell TH6220U2000? Several factors could be at play. Initially, ensure the thermostat isn’t directly exposed to sunlight, drafts, or heat-generating appliances, as these can skew readings. Also, verify the thermostat is level on the wall; an uneven installation can affect accuracy.
Check for obstructions near the thermostat that might block airflow. Next, utilize the thermostat’s calibration feature (refer to the programming section of this manual) to adjust the temperature offset; This allows you to manually correct minor discrepancies. Furthermore, confirm that the thermostat’s location isn’t representative of an unusually warm or cold spot in the room.

If the problem continues, consider a reset of the thermostat to its factory settings. Finally, if calibration doesn’t resolve the issue, there might be a sensor malfunction, necessitating professional diagnosis and potential replacement. Remember to allow sufficient time for the thermostat to stabilize after installation.
Wi-Fi Connection Problems
Encountering difficulties connecting your Honeywell TH6220U2000 to Wi-Fi? First, ensure your home network is functioning correctly and that you have the correct Wi-Fi password. Verify the thermostat is within range of your router; weak signals can cause connection failures; Try restarting both your router and the thermostat – a simple reboot often resolves temporary glitches.
Confirm your router’s security settings are compatible with the thermostat (WPA2 is generally recommended). Check if your router has a limit on the number of connected devices; exceeding this limit can prevent new connections. Also, temporarily disable any firewall settings on your router to see if they are blocking the thermostat’s access.
If issues persist, consult your router’s manual for specific troubleshooting steps. Consider updating the thermostat’s firmware (if available) as updates often include connectivity improvements. Finally, if all else fails, contact Honeywell support for further assistance.
Leave a Reply
You must be logged in to post a comment.